Introduction
Astrography, the practice of documenting the wonders of the cosmos, is a hobby that many people around the world enjoy. Key to this endeavor is understanding how to use a refractor telescope for astrography.

A refractor telescope is among the most common types of telescopes used today – and for good reason. The combination of portability, high contrast views, and fast cool-down time makes it an ideal choice for beginners and experts alike in the field of astrography. This blog post will teach you ‘how to use a refractor telescope for astrography’.
The first point in learning how to use a refractor telescope for astrography lies in understanding its basic structure. Unlike reflective telescopes that use mirrors, refractor telescopes use lenses to magnify distant objects. This design offers a high degree of contrast and well-corrected color images.
When learning how to use a refractor telescope for astrography
It is important to remember that set-up and alignment are crucial for successful night sky observations. For beginners, a lower power telescope may be more user-friendly, particularly if it doesn’t have GoTo capability or a computerized mount. Yet in using a refractor telescope for astrography, with time, you can master the procedure.

As seen in typical examples of how to use a refractor telescope for astrography, many opt for a wide-field refractor. This choice provides a smoother user experience during the acquisition stages of astrography than other forms of telescopes, making it easier to capture detailed and comprehensive images.
Continuing with the topic on how to use a refractor telescope for astrography, let’s focus on the imaging process. Due to its high contrast capability, a refractor telescope renders brighter stars effectively. This advantage, combined with the correct exposure settings, can yield stunning images of nebulas, star clusters, and galaxies.
Conclusion
In conclusion, the process of how to use a refractor telescope for astrography can be simplified into three parts: understanding the device, setting it up, and aligning correctly, and taking the plunge into deep-space imaging. However, it should be noted that mastery will come over time, wrapped in a cloak of patience and eager learning.

To wrap up, understanding how to use a refractor telescope for astrography is an absorbing journey. With the correct knowledge and a passion for the cosmos, the wonders of the universe can become a regular sight in your lifetime. One telescope, a thousand sights!
That’s ten times ‘how to use a refractor telescope for astrography’. Remember, patience is key as the cosmos didn’t form in a day, and capturing its deepest secrets will take time and practice.
Steps for how to use a refractor telescope for astrography
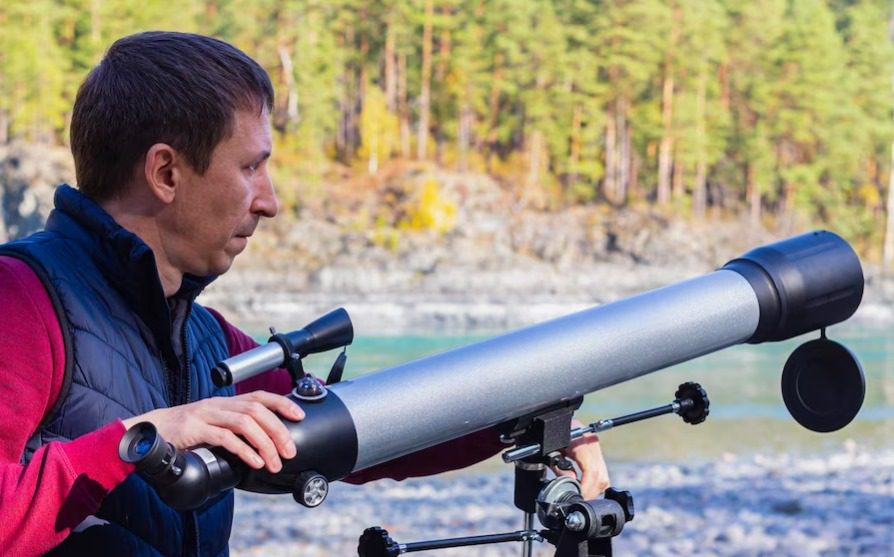
Using a refractor telescope for astrophotography can be a rewarding experience, as refractors are known for their crisp images and lack of chromatic aberration. Here’s a step-by-step guide to help you get started with astrophotography using a refractor telescope:
1. Equipment Setup:
- Telescope: Choose a refractor telescope with a moderate to long focal length, as this will provide higher magnification and better image quality.
- Mount: Use a sturdy equatorial mount to track the movement of celestial objects. A motorized mount with GoTo capabilities is preferable for ease of tracking.
- Camera: A DSLR or mirrorless camera with manual settings and interchangeable lenses is suitable for astrophotography. You can also use a dedicated astronomy camera.
- T-Ring and Adapter: Get a T-ring specific to your camera brand and an adapter that fits your telescope’s focuser.
2. Telescope Alignment:
- Set up your telescope and mount in a location with minimal light pollution and a clear view of the sky.
- Align your equatorial mount using the polar alignment procedure to ensure accurate tracking of celestial objects.
3. Camera Setup:
- Attach the T-ring to your camera and connect it to the telescope’s focuser using the appropriate adapter.
- Make sure your camera is fully charged and has enough space on the memory card.
- Set the camera to manual mode and disable any noise reduction or long-exposure noise reduction settings.
4. Focusing:
- Choose a bright star or planet in the sky and use the telescope’s focus knob to achieve sharp focus. You can also use a Bahtinov mask or electronic focusing aid for precise focusing.
5. Framing and Composition:
- Decide on the celestial object you want to photograph and frame it within the telescope’s field of view. Use the telescope’s alt-azimuth controls to adjust the framing.
6. Exposure Settings:
- Start with the following initial settings: ISO 800-1600, aperture wide open (lowest f-number), and a short exposure time (e.g., 10-15 seconds).
- Take test shots to check for proper exposure and adjust settings accordingly. Avoid overly long exposures to prevent star trailing.
7. Guiding (Optional):
- For longer exposures, consider using autoguiding to correct for any tracking errors. Autoguiding involves using a separate guide camera and software to make real-time adjustments to the mount’s tracking.
8. Capturing Images:
- Take a series of images (a technique called “stacking”) with the same settings to reduce noise and improve image quality.
- Experiment with different exposure times, ISO settings, and the number of frames to capture the best data.
9. Post-Processing:
- Transfer your images to a computer for post-processing. Use software like Adobe Photoshop, PixInsight, or DeepSkyStacker to align, stack, and enhance your images.
- Apply noise reduction, adjust levels, enhance details, and correct colors to bring out the best in your astrophotographs.
10. Patience and Practice:
- Astrophotography takes practice. Be patient and don’t be discouraged by initial results. With time, you’ll improve your skills and capture stunning images of the cosmos.
Remember that astrophotography is a skill that develops over time. Start with simple objects like the Moon and planets before moving on to deep-sky objects like galaxies and nebulae. As you gain experience, you’ll refine your techniques and capture more impressive images.