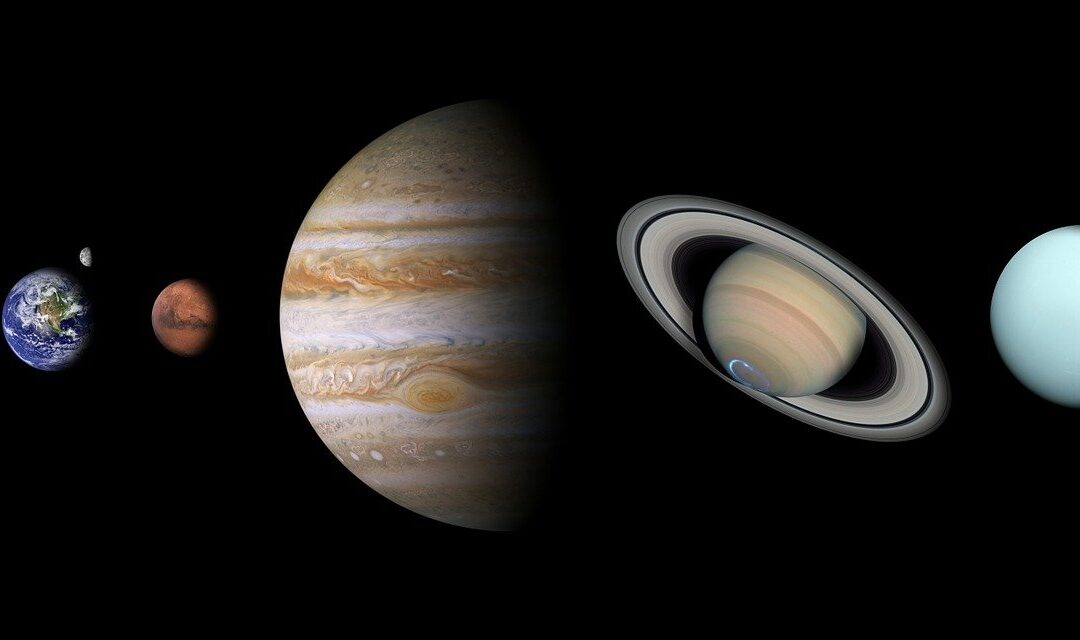
PLANETS WITH A BEGINNERS TELESCOPE
by T.K | March 3rd, 2022 |
Before we talk about looking at the planets with a beginners telescope you need to learn to find the planets, at least Mercury, Venus, Mars, Jupiter, and Saturn. You also need to learn to find them without a telescope because if you can’t find them without a telescope, I guarantee you won’t be able to find them with a telescope! We’ll talk about Neptune and Uranus last because you do need a telescope to see these planets and requires a different approach.


PLANET
The word planet originates from a Greek word meaning wanderer and this is because planets appear to wander across the sky from day to day and month to month, that said they don’t wander all over the sky they’re always found near the ecliptic, Ecliptic is just a fancy word for the path the sun takes across the sky. Now the planets are found near the ecliptic because the planets orbit the sun in a disk, we call the plane of the solar system and here on earth we are within that plane.
ECLIPTIC
Sometimes the ecliptic sits low in the sky which is why Saturn in 2020 during the summertime appeared so low in the northern hemisphere sky, now fast forward a few months to winter of 2021 and the planet Mars appears almost directly overhead. So why does this matter? Well, objects overhead offer clearer views because we’re looking at them through less of earth’s atmosphere. They are also higher above the horizon and less likely to be blocked by trees or buildings.


VENUS & MERCURY
Venus and Mercury however orbit closer to the Sun than the earth and therefore never stray far from the Sun and can only be viewed either just before sunrise or just after sunset and because these are viewed around sunset or sunrise the ecliptic is highest in the first day of spring, or sunset on the first day of autumn. Try to see planets whenever they are visible because life is short and if you wait for things to be perfect, you’ll probably get clouded out anyway.
DAYTIME
Now here’s an interesting question, can you see the planets during the day? Yes, with a telescope you absolutely can though it helps to have a very good, computerised telescope. In fact, you can see Venus during the day without a telescope. However, without an object like the moon positioned nearby it’s nearly impossible for your eyes to focus correctly and all you’ll see is the blue sky, but if Venus and the Moon are very close together then it’s easier to see the tiny white dot that is Venus. In the daytime sky you can see planets and a few bright stars but please be very careful, do not point your telescope anywhere near the sun because you could seriously damage your eyesight.


TERMINOLOGY
I just want to go over a few terms you might hear when researching planets, first you might hear about conjunctions well to put it simply this generally refers to when two or more planets or the moon appear near each other in the sky, you may also hear the term opposition this is when a planet is directly opposite the sun from the earth this also means that the planet is near its closest to Earth and also that it’s the highest in the sky in the middle of the night. Opposition is generally a great time to see a planet with a telescope. Less frequently you may hear the term ‘greatest elongation’ this only refers to Venus and Mercury and occurs when the planet appears farthest from the sun when viewed from earth. You may also hear the term ‘retrograde’ which simply means that the earth has passed a planet in its orbit just like you might pass another car on the road, and like the car you just passed the planet will briefly appear to be traveling in the other direction as it moves across the sky.
Now onto finding the planets, so what’s the best way to know which planets are visible on a given night? There are so many options all of which work equally well.
- You could subscribe to a magazine like BBC Sky at Night
- You could use Stellarium free astronomy software
HOW TO VIEW
Finally, how do we find these planets with a beginners telescope? From this point onward I’m going to assume that you’ve determined exactly where the planets are going to be on the night that you’re doing you’re observing. When first attempting to view a planet make sure you remove any Barlow Lens from your telescope, choose your lowest powered eyepiece that’s the one with the highest focal length, the focal length of the eyepiece is always written right on the eyepiece. Using as little magnification as possible will make the planet much easier to find in the telescope. So now that you can clearly see the planet in the sky without the telescope now you take your telescope and point it in the general direction of the planet then you move to your Finder-Scope and centre the planet precisely in the finder. Now move to the eyepiece if the planet does not appear in your eyepiece then the telescope and the finder are not aligned correctly and you’ll want to read my tutorial on setting up the Finder-Scope.


MAGNIFICATION & FOCUS
Take the time to make sure that your focus is perfect, remembering that the focus may be unique to your prescription so if you’re stargazing with others make sure you teach them how to focus the telescope for themselves. Planets should appear as crisp and clear as possible, now take a moment to observe and appreciate the planet at this minimal magnification, if it’s Mars it’ll probably look like a bright red star but if it’s Jupiter you’ll see the four Galilean Moons, and if it’s Saturn you should be able to see the rings! Once you’ve mastered observing the planets at low magnification now it’s time to zoom in, you do this by removing the low-powered eyepiece and adding a higher-powered eyepiece. Now look through the eyepiece again centre the planet and again refocus until the planet is clear and crisp, and finally to zoom in even more you can add a Barlow Lens, remove the eyepiece, and put the Barlow between the eyepiece and the telescope eyepiece barrel. Again, you’ll need to look in the eyepiece centre the telescope and refocus, if you’ve lost the planet you may need to remove the Barlow and return to the lowest powered eyepiece starting the process over. You may also notice that although the Barlow allowed you to zoom in it didn’t necessarily improve your view this is because you may be approaching your telescope’s maximum useful magnification.
URANUS & NEPTUNE
Now, before we talk about Uranus and Neptune I have a quick message for beginner telescope users, telescopes can be frustrating and maybe you’re having trouble getting the scope set up, focused and you’re having trouble finding cool stuff to see in the sky even if you’re using a good quality telescope, but please don’t give up, with a little more practice you will soon become familiar with operating the telescope in the dark and finding objects of interest. Back to the planets, so far we’ve looked at how to find planets that are visible to the naked eye but what about Uranus and Neptune these planets can be challenging to find with a beginners telescope, they are easiest to find with a computerised telescope or with a Konus smartphone adapter which uses your phone to precisely point the telescope, but if you don’t have any type of computerised assistance you’ll have to star hop to the planet, to do this bring up the planet in astronomy software and note exactly where it is using neighbouring stars as a reference, build a set of directions to the planet based on these reference stars and point your telescope precisely at this location using your finder. At this spot you may be able to see Uranus or Neptune in the finder as a small bright dot assuming the finder scope itself is powerful enough if you’re using a Red Dot Finder, you won’t see it since these finders do not provide any magnification. If you’re searching for Uranus and Neptune, you’ll want to start with the lowest powered eyepiece as soon as you’ve found it then you’ll want to move up to higher powered eyepieces and maybe even the Barlow Lens. Depending on the size of your telescope you may be able to resolve the planet’s disk and see one or more of its moons.


TAKE A PHOTO
Well after you’ve found a planet that looks cool to your eye like Saturn and if you’re like most people you’ll want to photograph it and share that photo with your friends so here’s how you do that. When taking a photo of a planet with a cell phone there are a few things you’ll want to consider first – It takes practice and a lot of practice, the phone must be lined up perfectly for the image to appear on the screen that’s why it helps to have a phone adapter, this makes it easier to align the phone lens with the eyepiece. The second thing you’ll want to consider is the camera app you’re using to take the picture, I usually use the standard app that comes with the camera but the challenge here can be getting focus and setting the correct exposure, it’s important that the planet is not too bright or overexposed, using an app like Nightcap allows you to lock the focus and the exposure because you need the planet to appear decently on the screen. For this technique to work the third thing to consider are the eyepieces and Barlow’s you’ll be using and this is where you really need to experiment for yourself just as it was with visual observing it’s easiest to find the planet with the lowest powered eyepiece and no Barlow, however, without higher powered eyepieces and maybe a Barlow the planet will appear tiny on the phone’s screen so you’ll need to find the eyepiece and Barlow combination that works best for you. Next you want to make sure that the planet is centred in the finder and the eyepiece and that it’s in focus. Now comes the tricky part you need to get the planet centred precisely on the phone’s screen and you need to be able to hold it steady, I usually cup my hand around the eyepiece and gently hold the phone, moving it ever so slightly to get that planet centred. If the planet bounces around on the screen we’re going to fix that when we get the video file onto the computer, once you’ve got the planet centred on the screen you’re going to want to zoom in just a little bit, you’re going to then adjust the exposure so that you can see details on the planet, as much detail as you can and you’re going to want to make sure that that focus is as good as you can make it so you’ll probably want to do a combination of focusing on the telescope itself and focusing in the camera’s application as well.
REGISTAX
Next, you’re going to take a video, the video could be anywhere between 5 and 30 seconds but for the duration of the video you’re going to do your best to see if you can keep the planet centred on the screen. Once you have a reasonable video you move that file onto a computer. There is some software which is free to download, and many Astro photographers use it, it is call Registax and it finds the best frames from your video and stacks them revealing a much-improved image.

Telescopes for Beginners – Main Types
Well, that’s it for this week viewing Planets with a beginners telescope, please visit again for more articles on Astronomy and using a small telescope.
If you would like more information on Planets with a beginners telescope or advice about the best telescope to choose, please don’t hesitate to contact me on 01733 306 731 or send me an email tim@uk-telescopes.co.uk
Don’t forget to sign up to our NEWSLETTER!